Difference between revisions of "Solve"
(→Retrieve/build a version of PHASTA code) |
|||
| Line 8: | Line 8: | ||
What remains is to determine the version of PHASTA to build and run. Since there are a bunch of researchers working on PHASTA at any given time, there are many branches/versions of the main code. If you are a part of the research cohort you may be directed to phasta-next, but many of the same steps may be taken from the public version. | What remains is to determine the version of PHASTA to build and run. Since there are a bunch of researchers working on PHASTA at any given time, there are many branches/versions of the main code. If you are a part of the research cohort you may be directed to phasta-next, but many of the same steps may be taken from the public version. | ||
==== Retrieve/build a version of PHASTA code ==== | ==== Retrieve/build a version of PHASTA code ==== | ||
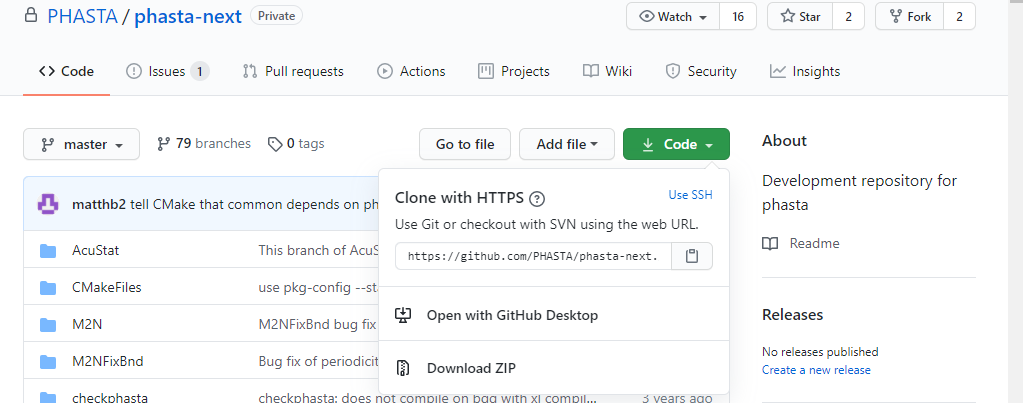
| − | Navigate to your home directory. Create a directory here named "git-phasta". In a web browser, navigate to the online git repository for phasta-next. Within this directory create one subdirectories named "phasta-next" and "build_phasta-next". | + | Navigate to your home directory. Create a directory here named "git-phasta". In a web browser, navigate to the online git repository for phasta-next and select the "clone" or "code" icon. The result should be the simular to the following picture, where a pop-up gives a web address: |
| − | + | [[File:GitClone.png]] | |
| + | |||
| + | |||
| + | Within this directory create one subdirectories named "phasta-next" and "build_phasta-next". | ||
=== Running the Solver === | === Running the Solver === | ||
Revision as of 21:13, 14 September 2020
Contents
Exporting to PHASTA
After the partitioning performed via Chef in the last steps, we have the problem domain in a form that the PHASTA executable can read. Make a directory named "Run". This will contain all of the simulation data from this case. Remember that for this onRamp tutorial we have partitioned our case of interest to 8 parts. Therefore we will also create a subdirectory named "8-procs-case". In this subdirectory make softlinks to the N=8 restart and geombc and restart "checkpoint" files that where constructed. When in this subdirectory a good command to do this is the following :
ln -s ../../Chef/8-1-Chef/8-procs-case/restart* .
ln -s ../../Chef/8-1-Chef/8-procs_case/geombc* .
Also create a numstart.dat file. This file will specify the time and timestep that the simulation has completed to. Use the following command in the "Run/8-procs_case" directory :
echo 0 0>numstart.dat
Build the executable/specify runtime parameters
What remains is to determine the version of PHASTA to build and run. Since there are a bunch of researchers working on PHASTA at any given time, there are many branches/versions of the main code. If you are a part of the research cohort you may be directed to phasta-next, but many of the same steps may be taken from the public version.
Retrieve/build a version of PHASTA code
Navigate to your home directory. Create a directory here named "git-phasta". In a web browser, navigate to the online git repository for phasta-next and select the "clone" or "code" icon. The result should be the simular to the following picture, where a pop-up gives a web address:

Within this directory create one subdirectories named "phasta-next" and "build_phasta-next".